How to Install the Canon LiDE 400 Scanner
Connect the Canon LiDE 400 with its USB Type-C cable, install the Canon software for your operating system, then scan a test page to confirm the driver sees the scanner. The cable carries both data and power, so there is no separate power supply to plug in.
On this page (8 sections)
- What comes in the box before you install the Canon LiDE 400 scanner?
- Which cable and port should you use for the LiDE 400?
- How do you install the Canon LiDE 400 driver and software?
- How do you connect and power up the Canon LiDE 400?
- How do you run a first scan and check the result?
- How do you fix a scanner that isn't detected after install?
- What settings should you choose for photos and documents?
- How do you keep the LiDE 400 working well?
Connect the Canon LiDE 400 with its USB Type-C cable, install the Canon driver and scan software for your operating system, then scan a test page to confirm everything works. The cable carries both data and power, so there is no separate power supply to plug in.
What comes in the box before you install the Canon LiDE 400 scanner?
The box holds the scanner and the included USB Type-C cable. Canon includes one cable for data and power, so you don't need a second cord.
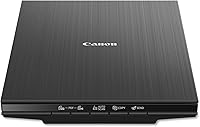
The LiDE 400 is a slim flatbed that measures 7.7 by 14.5 by 0.4 inches and weighs 3.6 pounds. Its footprint fits a desk edge or a shelf beside your computer.
It has no wireless radio, so it stays tethered to the machine it is plugged into.
Clear a flat, dry spot near your computer before unpacking. Leave room to open the lid fully and to slide a page in and out.
Keep the scanner away from drinks and dusty surfaces, since the glass is the working part. Check that your computer has an open USB port.
Which cable and port should you use for the LiDE 400?
Use the included USB Type-C cable and plug it into a USB port on your computer. The LiDE 400 takes both data and power from that single connection.
A USB 2.0 or USB 3.0 port both work. A port on the back of a desktop tower is usually more reliable than a hub or a front-panel port, because it stays connected and powered.
Avoid unpowered hubs when you can.
Seat the connector firmly at both ends. A loose Type-C plug can cause scans to stop partway or the software to lose the device.
If you plan to move the scanner between rooms, unplug it first, since a tug on the cord can tip the light unit.
How do you install the Canon LiDE 400 driver and software?
Download the Canon driver and scan utility for your operating system from Canon's support site, then run the installer while the scanner is connected. The driver lets the computer talk to the scanner.
Canon lists support for Windows 7, Windows 8.1 and Windows 10, plus Mac macOS X v10.11 through macOS v10.13 (High Sierra). Linux works with the ScanGear MP driver installed.
Pick the matching file rather than a generic one.
Close other programs before you install. Leave the scanner plugged in when the installer asks, so it can detect the device.
On Windows, the driver and scanning utility often install together. On a Mac, the installer places them in your applications.
If the installer offers a restart, do it before the first scan.
If your operating system is newer than the versions Canon lists, get the current driver from Canon's support pages and confirm it matches your version. A driver built for an older system can fail to load on a newer one.
How do you connect and power up the Canon LiDE 400?
Plug the Type-C end into the scanner and the other end into the computer, then let the system recognize the device. There is no power button to press on many units.
Watch for a small light or a message on screen that shows the computer found the scanner. If nothing happens, try another port before assuming the cable is bad.
A port that already runs a printer or a hub may not supply enough power.
Open the scan program and look for the LiDE 400 in its device list. Seeing the model name there is the sign the driver and cable are both working.
Keep the cable clear of the lid path so it isn't pinched under the hinge.
Wipe the glass once before you scan anything. A soft, lint-free cloth removes dust and fingerprints without scratching the surface.
The Puomue cloths are 16 by 16 inches and machine washable.
How do you run a first scan and check the result?
Open the Canon scan utility, place a page face down on the glass, choose a mode, and press scan. Then open the saved file and check that it looks right.
- Lift the lid and lay the page face down, aligned with the corner marks.
- Close the lid gently so the page sits flat against the glass.
- Open the scan program and pick the LiDE 400 as the device.
- Choose a mode such as photo or document, then start the scan.
- Save the file and open it to check the result.
The LiDE 400 has five EZ buttons on the front. One starts an auto scan, where the scanner detects what you placed and picks settings for you.
Others send a scan straight to a PDF or a copy action. The PDF button saves multi-page documents as editable, searchable files.
Try a plain document first at a moderate setting. A page of text is easy to judge: you can see whether the letters are sharp and whether the whole page made it into the file.
Then scan a photo to check color and detail.
Canon rates the scanner at as fast as 8 seconds per scan. That speed suits ordinary documents.
A photo at the full 4800 x 4800 dpi setting takes longer, so reserve it for images you plan to keep.
How do you fix a scanner that isn't detected after install?
Recheck the cable, the port, and the driver in that order. Most detection failures come from a loose connection or an unfinished install.
Unplug the Type-C cable and plug it back in at both ends. Try a different USB port, ideally one on the back of the computer.
Skip hubs and extension cables while you troubleshoot.
If the port and cable are fine, reopen the installer or the device list and confirm the LiDE 400 appears. A driver for a different Canon model won't drive this scanner.
Remove the wrong driver and install the one for the LiDE 400.
Restart the computer after reseating the cable. On a laptop, check that the USB port isn't in a power-saving mode that cuts current to the scanner.
A failed cable is a simple fix, since the Type-C connection is the only power path the unit has. For the handling side, our guide to how to clean old photos before scanning covers preparing pages.
Dust on the glass shows up as specks and streaks in every scan. A wipe or a lint-free cloth used before each session keeps the glass clear.
What settings should you choose for photos and documents?
Use a moderate resolution for documents and a higher one for photos you plan to keep. The LiDE 400 reaches 4800 x 4800 dpi, but not every scan needs that level.
For everyday documents, a lower setting keeps files small and scans quick. For photos you intend to archive or print, the higher resolution captures more detail.
The scanner supports 48-bit color depth and 16-bit grayscale, which give you room to edit afterward.
Turn on the image enhancements when you scan older photos. Canon includes color restore and dust removal, which help faded prints look closer to their original state.
Keep a clean copy without the fixes if you want to preserve the raw image.
Scan multi-page documents with the PDF button so the pages save as one searchable file. The flatbed takes pages up to 8.5 by 11.7 inches, so letter and A4 sizes fit.
Our guide to how to organize scanned photos shows how to name files so you can find one years from now.
How do you keep the LiDE 400 working well?
Keep the glass clean, store the scanner flat, and use the right settings for each job. A few habits prevent most scan problems.
Wipe the glass with a soft, lint-free cloth before a session. Don't spray cleaner directly on the glass; dampen the cloth first and keep liquid away from the seams.
Close the lid when the scanner is idle and set nothing heavy on top.
Handle photos by the edges and check them for loose grit before they touch the glass. For more on safe handling, our guide to how to clean old photos before scanning covers the steps.
If you're weighing this model against its smaller sibling, our comparison of the Canon LiDE 300 vs 400 explains the differences. And if you end up with the 300 instead, the steps in how to install Canon LiDE 300 scanner follow the same order.
Frequently asked questions
Does the Canon LiDE 400 need a power cable?
No. The LiDE 400 runs from the included USB Type-C cable, which carries both data and power.
Plug that single cable into your computer and the scanner gets its electricity from the USB port, so there is no wall adapter to connect.
Does the Canon LiDE 400 work with a Mac?
Yes. Canon lists Mac support for macOS X v10.11 through macOS v10.13 (High Sierra).
If you run a newer Mac version, get the current driver from Canon's support pages and confirm it matches your version before you install.
Can I use the Canon LiDE 400 without installing software?
Windows and macOS need Canon's driver and scan software for the buttons and full resolution to work. The LiDE 400 also lists Linux support through the ScanGear MP driver.
Install the driver first, then use the EZ buttons or the scan program.
How long does it take to scan a page on the LiDE 400?
Canon rates the LiDE 400 at as fast as 8 seconds per scan. A full page at 4800 dpi takes much longer than that, so keep high-resolution passes for photos you plan to keep and use a lower setting for quick document copies.
What should I scan first to test the setup?
Scan one ordinary page at a moderate setting, then open the saved file to check that it is readable and the right way up. A photo or a receipt is a good second test, since it shows whether color and fine detail come through cleanly.